Manage Invitees |
![]()
| The Manage Invitees routine allows the user to manage the invitees for a
particular Marketing Program. The Marketing Programs and Events referred to in this
routine are those that are created and maintained through the Marketing
routine. In the Invitees routine, the user can select who is invited to the Event, and can
track responses, etc. The user can also track those who attended the Event (after the
fact) and allocate Event expenses to those who attended. This routine also allows the user
to create Invitee lists and mailing labels. When the Manage Invitees routine is accessed from the eQuinox main menu, the screen shown below will be displayed. |
| Field Definition |
|
|
|
|
Market
Programs The name of the Marketing Program for which the user is managing Invitees. This information is displayed automatically once the user makes a selection from the List of Values provided in the next field. A selection must be based on both the Marketing Program and the Marketing Event. The Marketing Programs and Marketing Events that appear in the List are those that are entered through the Marketing routine.
Market Event
Date |
|
|
Max
No Inv The maximum number of Invitees permitted for the current Event, as entered in the Marketing routine. This value is for display purposes only and cannot be edited or updated by the user.
Event
Expense
Total Invited
Total Attended
Alloc Expense to
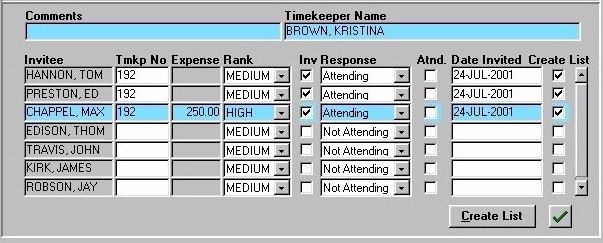
Invitees In the section seen below, all Invitees and potential Invitees for the current Marketing Event are displayed. |
|
|
Comments Any comments or additional information that the user may wish to record for the current Invitee.
Timekeeper
Name Invitee
Tmkp
Expense
Rank
Inv
Response
Atnd
Date Invited Create List
(Checkboxes) Create List
(Button) |
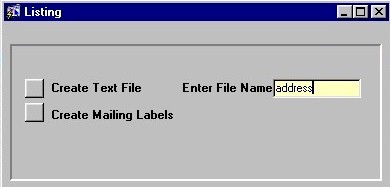
| The Listing Sub-form |
|
The Listing
sub-form allows the user to create a text file listing all Invitees that have the
Create List field 'checked'.
Before creating the text file, the user must enter a file name in the
Enter File Name field. To create the text file, the user must click the Create Text File button. The Listing sub-form also allows the user to create mailing labels for all Invitees that have the Create List field 'checked'. To create the mailing labels, the user must click the Create Mailing Labels button. |
![]()