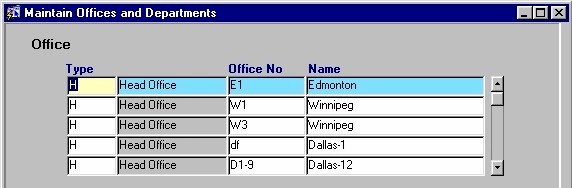
Maintain Offices and Departments |
![]()
| The Maintain Offices and Departments routine allows the user to enter, view, or
edit information about a Firm's Offices, and the Departments within these Offices. When
entering information about new Offices, the user must provide a unique Office number, as
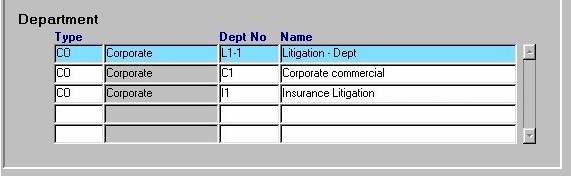
well as the office type and name. When entering information about new Departments, the
user must provide a unique Department number as well as the Department name. Note: Department information must be entered in context of an Office. A Department cannot be deleted while dependent records exist (i.e. dependent Matters, dependent GL transactions, etc.). An Office cannot be deleted while it has Department records associated with it. When the Maintain Offices and Departments routine is accessed from the eQuinox main menu, the screen shown below will be displayed. |
| Field Definition |
|
|
|
Type
Office
No
Name |
|
| Note: The information displayed in the Department section of the screen is specific to the Office selected above. |
|
Type The unique identifier and name indicating the type of Department (i.e. Corporate, Litigation, Real Estate, etc). If changes are necessary, the information may be selected from the List of Values provided.
Dept No, Name |
| Once the user has finished entering or updating information, they must click the Save button or press F10 to commit the changes to the database. |
![]()